Level 2 is here already! This time we're looking at ripples, which has always been a good place to start with liquid effects animation.
Later in this level we'll study the intricacies of airborne liquid like droplets and small splashes, but before that happens we need to lay a foundation by studying a water surface.
The craziest, most complicated water animation happens when there's a lot of movement. Water surfaces can be some of the most difficult of all advanced 2D effects, so we'll begin by dipping our toes into a calm, glassy pond and studying the ripples.
Beginning with an impact, a ripple is a tiny wave. A raised ridge of water that propagates across the surface in all directions until interrupted or dissipated. The ripple travels across a surface distorting light with unique refraction and reflection effects. The movement and surface behaviour is instantly recognisable because of reflectivity and transparency.
If you know where to look, you can see wave motion everywhere. Here's a simple example. Imagine a long thin chain stretched along the ground. One end is fastened securely to a post. Standing at the other end, you grasp the end of the chain. With a quick flicking movement, you pull the end of the chain upward, then bring it down sharply as if cracking a whip. This quick up-down movement creates a wave that rapidly runs the entire length of the chain.

you may have done this with a garden hose and seen the effect for yourself
This happens because the energy you created has to go somewhere. You set the wave in motion with your flick, so forward it goes. Your arm moves the first links, which in turn move the next links, and the next and the next and the next, and so on. This transfer of energy travels to the end of the chain and then "bounces" off the post before travelling back toward you.
The important thing to notice is that, although the wave travels along the chain, the chain itself isn't moving toward the post. If you paint one of the links red, the painted link doesn't travel toward the post. It simply rises up and down with the wave (see the rope example above).
When a water ripple starts, it's a high, narrow wave. As it propagates away from the point of impact, the height falls and the base broadens.

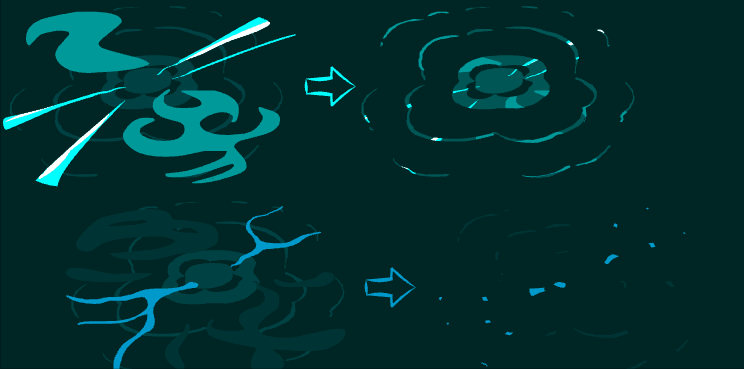
Dissipation of a ripple is due to the gradual lowering of the wave height. Given enough time and area, even the smallest impact can send out ripples that cover a relatively large area. This is because, realistically, wave height and velocity decreases very gradually. In traditional animation, we rarely have the luxury of animating ripples that travel very far, so it's usually necessary to confine the ripples to a manageable area.
Animate a cross-section of a ripple, as demonstrated in the video below.
Picture a clear water surface. What do you see? You see light. In perfectly clear liquid, this light is animated to reveal what would otherwise be an invisible phenomenon. Also, floating debris or mini disturbances on the surface, such as bubbles, can help show ripple movement. Surface shadows and sub-surface refraction play a more subtle role.
In 2D animation, the usual starting point to designing ripples is to draw a number of graceful rings, lines, or tapered bands. These become thinner and break up as they radiate away from the impact.

Left: Simple line ripples; Right: Band ripples
As explained in the previous section a ripple is, realistically, a reflective ridge that starts high, then lowers as it travels. You can add realism to line ripples or band ripples with the simple addition of shadows and highlights (see below). As the ripple's energy dissipates, the shadow and highlight grow thinner and eventually disappear.

Ridges: highlight and shadow
When you have a simple impact and unobstructed wave propagation on a perfectly calm surface, you get the easiest type of ripple: the iconic concentric rings design. Viewed from directly above, this ripple may be a series of perfect circles, radiating outward, thinning and disappearing.

Concentric ripples are well suited to simple impact on calm water.
If animated and treated well, this is an effective all-purpose design that looks quite good as well as being a time-saver. If tilted in 3D (see the video below) it can work well in many situations.
A complete amateur might animate a ripple cycle as a perfect circle, then simply squash the animation. This is bad. Why? Well first of all, when you squash anything, the centre point stays in the middle. However, in realistic perspective the centre point should be further back as seen in these images.
Secondly, in perspective the foreshortening is greater in the back and less in the front. With a simple squashed ripple however, there's no foreshortening. In a scene with perspective, this ripple looks "slapped on", as if the ripple was created for a completely different scene! The following video demonstrates this.
The only situation where a simple squashed ripple could work is in an isometric view, as seen in some games. The rules of perspective don't apply in isometric, so your ripples could be animated from a top-down view, then squashed and skewed to suit the isometric scene.
As we saw in the beginning of this article, ripples are waves of energy originating with a surface impact, then into a process of slowing down. When you animate ripples, a more gradual slowdown and dissipation can help with realism. Unfortunately, the line mileage of realism is incredibly tedious so it's generally necessary to break up a ripple and dissipate it in a reasonable length of time that's not too quick, but not too long.
With animation software, we can reduce the line mileage by using morphing, tweening and other software tricks. Ripples are a perfect excuse for such auto-interpolate tools.
If your ripples are caused by a continuous disturbance, like a fountain for example, you may need to cycle, or loop the animation. In the video below, I'll take you through that process so that your ripple animation can be cycled for use in a scene of any length.
The "scribble cel" is a very old traditional animation trick that translates beautifully to digital 2D animation. With most software, we can use a simple mask/reveal or cutter technique to achieve the effect that's incredibly efficient and looks great. If the budget's tight, I'll show you --in the video below-- how to liven up a surface with just two drawings.
And the result:
Earlier we saw an image of the most popular treatment of ripples; a line, or tapered band of a single colour. Sometimes, to add some sparkle, a highlight is added to some edges. Even the biggest budget 2D feature films use these simple ripple treatments. Here they are again:
The most realistic treatment would represent the bending of light. This is achieved not by animating ripples, but by animating reflections. We'll be covering this advanced technique in a future article, but it involves using line ripple animation as a mere guide for the more complex reflection animation.

Animated reflections are more realistic than line or band ripples
Note: If you're new to effects animation, you may like to work with an opaque liquid, e.g milk or blood. You might find these less confusing because you don't need to worry about what's under the surface.
As your ripples animate, the highlight and shadow areas may remain fairly steady. In this case you could use a masked highlight technique where your reflected elements, including the light source, are created on their own layer then revealed (using a mask, or cutter) by the ripple band.
The examples below show some interesting effects using a masked highlight. The bottom example is particularly effective, not only with animated highlights, but the ripples are completely hidden, with only the reflections visible.
Easy - Animate a line with a series of waves that travel from one end to the other. Experiment with different wave heights and timing. Try starting with high wave heights that flatten as they travel along.
Intermediate - On a calm surface, animate concentric ripple rings radiating out from a floating object. Try moving the object and have the ripples respond to the movement.
Advanced - Animate the ripples around an object that is drifting with some gentle current, such as an unanchored boat. Think about the direction of the water current and how that will affect ripple movement. Will they go with or against the current? Will going against the current cancel the strength of the ripples?

As with all these "simple" effects, familiarisation will help you tackle larger, more difficult scenes with confidence. I can't place enough emphasis on the importance of perspective, so make a conscious effort in every ripple scene to draw AND move the ripples in accordance with the rules of perspective.

