The speed at which something falls in your scene depends on a number of factors, like frame rate, scale and the shape and/or material of the falling object. Learning to animate something falling under the everyday influence of gravity is incredibly important and sets you up for animating almost anything.
The concepts discussed in this article apply to a wide range of animated effects, so we'll deviate slightly from our usual format.

The earth is just like a large magnet, and almost everything on earth is like that tiny steel ball. We are permanently attracted to the surface and no matter how hard we try, or how high we jump, that force brings us back every time. It requires an unfathomable amount of energy (space agencies spend billions) to jump clear of earth's gravitational field.
Life on Earth has evolved to live and cope with the effects of gravity, but you only need to stumble and that magnetic force can pull you to the surface hard enough to cause injuries. If you fall from high enough, gravity will bring you to earth with enough force to smash you like an egg.
With that cheerful thought in mind, we're going to look at how we animate gravity's influence on objects.
As already mentioned, there are several factors that influence how you'd animate a falling object. These must be carefully considered before attempting to animate the scene. Some key factors are:
Other factors include perspective, wind turbulence and air pressure, but we'll keep it simple for now. We'll be animating a few objects flying, falling and bouncing.
Just like wind, heat and magnetism, we don't animate gravity, as you know. We animate objects under its influence. So when setting up a scene you will consider the objects and conditions in the scene.
Whether you find these concepts difficult or easy to grasp, animating an object falling with realistic timing takes practice.
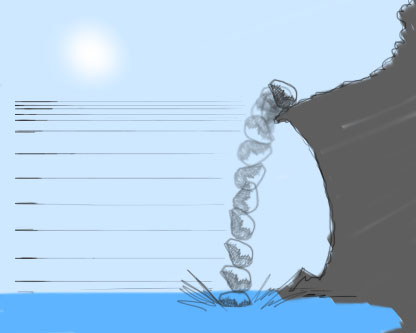
No, this isn't some skin condition affecting FX animators. Effect scale means the size of your effect and/or distance from camera. For example, if a boulder falls from a cliff in the distance, the scale of the movement is distant, and therefore small on screen; the object moves in small increments from frame to frame.
All scene elements are affected by perspective though, including the scale of gravity timing. So if the same boulder is close to camera, then the distance between each drawing is greater, which means the movement scale is larger.
Bearing in mind the rules of perspective, frame-by-frame gravity scale will diminish with distance, just like everything else in the scene.
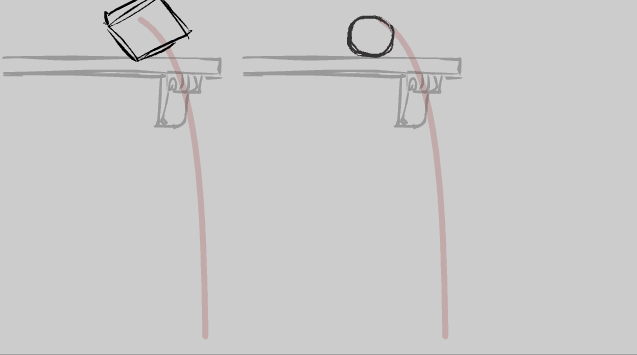
Let's suppose then, you have a mid-shot of a character, i.e., framed from the waist up. He's standing in the scene a few metres from the camera. If an iron weight lands on him, with realistic gravity animation it should require no more than 1 or 2 frames. The scale of this movement is large relative to screen space. The distance between drawings in this case is also large.
Taking gravity's velocity of approx 9.8m/s² I've always settled on a rough distance of 41cm per frame that I use for any scene where an object is free-falling (not taking into account any gradual speed increase at the start of the fall). This means that if I know the scale of distances and objects in my scene, 41cm per frame is a pretty good estimate for the maximum speed of a falling object.
Knowing this, you can see how a giant boulder falling in the distance may appear slower. Because waaaay back there, 41cm looks small. In this way, you can understand how the same boulder falling closer to us may appear faster.
A word on theatrical movement however - you can be familiar with all the physics formulae in the world, but remember, these are merely foundations and we are artists. Very often you might find that real-world physics make some elemental effect seem a little too quick, lifeless or less graceful. One example that comes to mind is the weightlessness of water splashes in animated features. A splash that floats down isn't realistic at all, but these are the liberties we can take as animators. (having said that... weightlesswatersplashesisoneofmypethates)

The composition of the falling object is another important consideration. A stone will drop through the air without a fuss, while a leaf will flit and dance, landing softly.
Alright, sure. A leaf and a stone are obvious examples. Now consider a few not-so-obvious examples. Imagine how the following objects differ from one another, in the way they fall through the air.
Each of these things are of different materials, weights and shapes. These factors are taken into account for realistic animation.
Things that are thrown into, or fall through the air are immediately affected by gravity and any initial upward momentum is soon overpowered. For example, when a javelin is thrown, we can watch as its upward momentum carries it higher and higher. As the energy of the throw is dissipated by gravity and other forces, the upward climb finishes and gravity now appears to be the primary force acting on the javelin, which starts to fall back to earth. This arc, the path of a projectile through the air is called a trajectory.

As an FX animator, you'll become increasingly familiar with the trajectories of various objects. Every trajectory is different, depending on the conditions of the scene. From the water droplets of a splash thrown upward, a boulder falling and bouncing down a mountainside, or beads of molten iron spat from a blacksmith's hammer.
Animating an object under the influence of gravity goes hand-in-hand with trajectories, so it's a good habit to plot the trajectory of your objects before you draw them in the scene.
As you gain more experience in animation, you'll develop a natural sense of timing for the frame rate you use most. Experienced traditional 2D animators generally have a well-developed sense of 24 fps timing, because that's the frame rate to which they're accustomed. Throw them into a 30fps project however, and suddenly their sense of timing is out. Even the familiarity of working on twos (one drawing every two frames) can be thrown out slightly whenever we switch to ones (one drawing for every frame), or vice-versa.
It takes practice to develop your sense of timing, but eventually the timing of gravity will become second nature. When you change frame rates though, you may need to adjust the distance between your drawings to compensate. Going from 24 to 30fps for example, means a slight reduction in frame-by-frame distances (because there's potentially 6 extra drawings per second, in the higher frame rate). The main problem is that there's no formula for adjustment. It's simply a matter of trial, error and tweak.
No doubt, there'll come a time when you need to adjust the frame rate after you've finished the animation (ugh!). It's irritating, even infuriating to have to change or fix something after you think you're done. Even so, if you're curious enough to perform it, this experiment will demonstrate the differences between timing and frame rates.
I've often said that FX animators always seem to have an advanced sense of timing because we have more experience with straight-ahead animation, as opposed to pose-to-pose method, generally adopted by character animators.
In straight-ahead, we draw one frame, then the next frame, then the next, then the next, and so on. This method helps build skills in creating realistic movement frame-by-frame. Over time we develop an innate sense of what the distances between drawings should be, for a broad range of tasks.
Pose-to-pose is done differently, as we discussed in the Smoke article. We draw key poses on single frames, then afterwards, add and tweak the timing spaces between those poses. After this, smoothing out the motion with inbetweening or morphing.
I also think that because of this, FX animators often make good character animators because our timing groundwork is well-laid. If you can "straight ahead", you can "pose-to-pose", but the reverse isn't always true.
So far we've only covered one straight-ahead effect: electricity. In the flame and smoke articles we used the pose-to-pose method because the movement for those effects is more gradual and subtle.
Depending on the speed of the fall or flight, gravity is usually animated straight ahead (frame-by-frame), or occasionally a combination of straight-ahead and pose-to-pose.
Frame rate: 24fps
Duration (seconds): 3s (72 fr)
Dimensions (pixels): 432 x 243 (16:9)
Tasks: Do not worry about final colour or; treatment. Choose from the following and make the timing as realistic as possible
Easy - Using the formula of roughly 40cm per frame, from a balcony approximately 2 metres high, animate a lump of soft clay dropping and plopping onto the ground. Remember, the distance between each frame will depend on the scale of your scene.
Intermediate - Animate a set of juggling balls, each being thrown upwards and falling down. Pay special attention to the trajectories and the easing as each ball reaches the top of the arc and falls back down
Advanced - As if thrown from a catapult, animate a sphere projectile flying away from camera across 20-30 metres. Optionally, add a ribbon trail as if it's hot, taking into account the momentum of the object.
None of this is secret knowledge, or guarded wisdom. Much of it is common sense and easily observed in our day-to-day lives. Nonetheless it always helps to have it presented to you, or written down for easy access and reinforcement.
Once again, with more and more experience, you'll develop a natural, almost automatic sense for timing gravity. This is a vital skill for a huge range of effects, from mud splashes to magic effects.
Just as character animators draw people as often as possible, I recommend that every chance you get, animate something falling and bouncing. Pick the frame rate you use most (commonly 24, 25, or 30 fps) and make it your mission to develop your sense of timing on it.

