In this lesson we're looking at something that, for many 2D FX animators, is a complete mystery. It's very difficult to animate and it's easily one of the most difficult of which to achieve a realistic treatment. We're talking about caustic refraction and reflection, referred to throughout this article simply as "caustics".
While the term "caustic", when applied to lighting effects, relates to refraction and reflection from or through various elements, this article will focus on designing, animating and treating caustic light effects in direct relation to liquid. These light effects have a universally recognisable design, due to their movement through a water surface. Light is bent and scattered as it passes through the animated surface.
A simple example is how sunlight passes through a magnifying glass. Such a lens is manufactured so that the light is bent in a specific way, allowing you to focus light into a hot spot. With water however, there's nothing manufactured about it. The chaos of shifting hotspots is highly unpredictable.

Fig. 1 - Water caustics operate on the same principle as light through a lens
If you imagine a water surface as a large, wobbling lens, you start to appreciate how those peaks and hollows, constantly growing, inverting and diminishing, project a most complex lightshow on a riverbed or ocean floor.
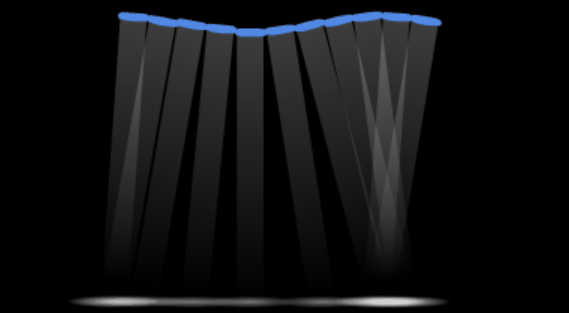 To greatly simplify it for the purpose of illustration,
imagine that the water surface is made up of many individual lenses. Each
lens bends light as it rolls and undulates with wave movement. The
animated example on the right illustrates this.
To greatly simplify it for the purpose of illustration,
imagine that the water surface is made up of many individual lenses. Each
lens bends light as it rolls and undulates with wave movement. The
animated example on the right illustrates this.
While there are simplified ways of creating a caustic effect, to really understand how caustics move, it's useful to know how a water surface moves. You've already seen a simply animated surface and did it yourself, back when you first animated ripples. This is a pretty good starting point for learning how caustic refraction works. In the video below, you can see a simple ripple and the start of the brilliant light focusing and scattering effect.
Apart from design, the thing that makes caustics so difficult to create is the focusing and scattering effect. Focused beams quickly become scattered beams and vice versa. It's a constantly changing effect that doesn't lend itself well to 2D pencil lines. How do we draw that??
As I mentioned earlier, the animation is quite difficult, so let's get into the design before moving on to timing.

Fig. 2 - caustic light reflection
If a caustic light effect is required in a 2D animation scene, it's usually for an ocean floor, or something under water. Another common use is a sunlight reflection from a nearby water surface, for example on the wall of an ocean cave (see Fig. 2).
In these instances, a single caustic animation cycle can be created flat (that is, no specific angles or positioning), then laid down and masked onto whatever scene surface requires it. You'll see this technique later in the treatment section.
The design depends on your intended realism for this effect. Figure 2 shows a pretty realistic design, but that's quite complex and would be difficult to animate. Let's look at a simplified line style first, then afterwards we'll take a look at something we can treat realistically.
You can find this very simple style of caustics which use a simple line. It does the job, especially if coloured and treated well. The video below demonstrates the design and construction of this style.
video 26_designLine
The reason you'd use a banded style of caustic is to prepare for a realistic treatment. The main characteristic is the variable width of the bands. This design starts with the line style anyway, so you can always enhance your line style caustics by adding bands, as demonstrated below.
video 26_designBand
Animating caustics is fun and quite forgiving, but it can take a few attempts to get right. The main problem beginners have is inconsistent movement speed and clunky cycles. If your keyframes are done carefully, then the inbetweens should take care of themselves. In the video below, I'm demonstrating the animation of a line style cycle. Then below that, the following video will demonstrate the animation of a banded style caustic cycle.
video 26_animLine
video 26_animBand
In 2D animation now usually use a simulation for this effect because it's expensive and time consuming to create. I believe I've developed a pretty good method though, which utilises a similar inner glow treatment that you saw waaaay back in lesson 0103.
Remember that caustics are the focusing and scattering of light, so you'll use high contrast and generally bright colours. The extremely variable intensity of the colour, from very bright to gentle, is a key characteristic of caustics.

Fig. 3 - brighter colour for focused light
If you're a Flash user you may get good results using the built-in filters, such as glow, shadow and blur. In the video below however, I'm demonstrating with Toon Boom so I can take full advantage of variable blur and variable opacity.
video 26_treatment
If your software is capable of warping or refracting, you may like to put a gentle warp over the effect. Applied carefully this will serve to further smooth out the animation.
Caustics in the following example were done with procedural noise in Toon Boom Harmony. Using mathematical noise animation for procedural effects certainly beats hand-drawing and frame-by-frame animation. However, by using digital effects, you often need to sacrifice some hand-drawn charm.
In the hand-drawn demonstrations so far we've seen a very limited style of caustic FX, while digital caustics may be considered a little too good and can easily clash with traditional animation. Either way, your decision will likely be to balance time and resources. Do you have time to perfect the hand-drawn method? Or is there a way to make digital effects appear more traditional?
Knowing how to animate a water surface is very useful when it comes to animating caustics, but the flip side is that caustics can help you better understand the complex movement of a water surface. You'll find that a truly great implementation of this effect is pretty rare in 2D, especially nowadays when software can simulate it with stunning realism. The fact is that while it's quicker, easier and less expensive to hit a "create caustic" button, those simulations really do clash with 2D and can be pretty distracting.
HERE is a really amazing and realistic interactive simulation of caustics. Click on the water surface to study the ripples, reflections, refraction and caustics in action. You can see here why it's such a difficult thing in 2D.
Even if you never need to animate caustics in a production scene, or indeed if you prefer to use live-action or caustics simulations, hand-drawn animation of the effect is always a challenging and fun exercise.
If time is short, perhaps you can work on your own caustic cycle as a spare time project. Revisit and refine it from time to time, so one day, you'll have it sitting in your FX library ready to drop into any scene. When people ask where you got it, you can stand on a chair, smile down at them and say "I made it".

