Following on from your earlier introduction to wave motion with ripples and flags, it's now time to start on another liquid effect. This lesson is the biggest yet and as we study surface tension, you'll animate a small droplet splash and call on your experience with ripples and gravity.
FX animators are usually introduced to liquid animation much later in their training, but aside from being slightly more complex than what you've learned so far, it’s interesting to study and fun to animate. For this reason I like to use a water droplet introduction as an appetite whetter.
As we look at various liquid effects, we'll mostly be scrutinising two manifestations of surface tension: 1. A water droplet; 2. A tiny splash made by that droplet.
Most of what we see and recognise as liquid behaviour happens because of a phenomenon known as surface tension. It's essentially an outer skin of energised water molecules that holds bodies of water together. Because of its tendency to pull and hold together, this skin causes a free body of water to try to form the simplest possible shape: a sphere.
When surface tension breaks, any pieces broken away will try to form their individual spheres. For example, you've probably seen what happens when water is tossed out of a bucket. It breaks up into countless individual spherical droplets, like rain.

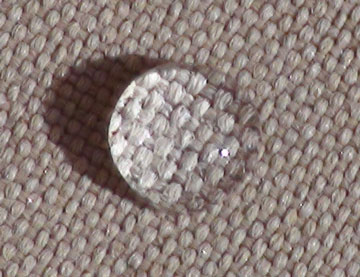
Airborne water forms beads in the air, constantly trying to stay together as a sphere.
In weightless conditions, a free body of water gradually settles to form a perfect sphere, like a crystal ball. Under ordinary atmospheric conditions however, bodies of airborne water constantly wobble and distort, as surface tension within the droplets works against the forces of gravity, self-collision and air turbulence.


Absorbing (image left) - Surface tension also causes droplets to merge with one another. When two droplets touch, their molecules instantly attract, so the skins become one, drawing the two bodies together. As a new, larger droplet, it will then try to assume a spherical shape. In the image at left, we see a sequence of two beads joining. As you can see by the frame numbers, this is an incredibly quick, almost instant transition especially if the droplets are very small.
Splitting (image right) - When water breaks apart, the pieces pinched off are immediately rounded. When a droplet is stretched sufficiently to break into pieces, those pieces also form spheres. Surface tension ensures that any breaks are immediately rounded off and the pieces broken free become beads.
In the splitting sequence on the right, you can see that in frame 7, the droplets are almost separated; then in frame 8, they're completely separated. In animation it's an instant transition, we don't draw pointy water!
.
Exercise one:
Draw a sequence of 5 or more frames where two droplets merge into one.
Exercise two:
Draw a sequence of 8 or more frames where a large droplet of water breaks in two or more beads.
If you want to be inspired by some slow-motion surface tension, there are a couple of easy-to-observe reference effects that give you plenty of time to see things happen and are simply mesmerising.
Of course, we don't necessarily have to watch viscous liquids to
appreciate slow-motion surface tension, when we have fantastic content
like The Slow Mo Guys on Youtube
.
In the video below we see a demonstration of a droplet splash cross-section where surface tension is hard at work.
 Wetting
and non-wetting
Wetting
and non-wettingAt some point we've all seen beaded water, like on a freshly waxed car, or water-repellent fabric. On other surfaces, like a concrete floor, the water may spread thin and wet the surface evenly.
Surfaces can be coated so that water can be either held, or repelled. Oil or wax may be used to repel water, while a wetting agent, in paint for example, can help the paint stick to various surfaces, like glass or polished metal. A wetting agent in herbicide will help the chemical stick to foliage that otherwise may naturally repel water.
This is something you may like to consider when designing your FX. Will the character's hat become soaked through? Or will the water bead and roll off? Will the raindrop splash and soak in? Or will it shatter into tiny beads that stay resting on the surface?
Generally in water animation, you must avoid any sharp points! One big mistake seen everywhere is the classic raindrop icon with a pointed tip. This is about as crazy as a pointy bubble; it simply doesn't happen, except under very specific conditions.
The only place you may see pointy water is in the high-energy directional impact frames in the distance, or at the very start of a hard impact splash. Remember that, because of surface tension, airborne water is constantly wobbling and fighting to retain that spherical shape within the skin of tension.

When you animate a scene filled with raindrops, it may not be necessary to animate each individual droplet wobbling and stretching. However, in a close-up scene, adding some wobble and stretch to a single droplet is a very nice touch. This is generally as simple as animating squash and stretch keys on 4s (see below), then inbetweening them on 2s. Remember to keep the volume consistent, regardless of the shape.
Exercise three
Draw a sequence of 12 fr with a single water droplet wobbling and stretching naturally.
In a droplet splash sequence we get to animate a simple splash with
minimal breaking and very few airborne beads. This makes it the perfect
introduction to water splashes. Understanding the cross section sequence
helps us animate a simple droplet splash from any angle.

 Exercise four
 From any angle you choose, draw a sequence of 6-9 main poses of a droplet splash, starting with impact, ending with ripples. Use the cross-section sequence below as a guide.

Design a droplet splash based on this cross-section.

The reason we looked at Gravity way back in Level 1 was to prepare for this moment. When animating the rise and fall of airborne water, it's helpful to have some experience with gravity timing.
In the droplet splash example of the previous section, we touched on how gravity works on the beads of airborne water, and against the rise of the splash. The trajectories and timing of beads are slower at the top, just like that javelin -or anything else- thrown into the air.
On this small scale, everything moves remarkably fast. Next time you watch raindrops on a puddle or pond, you'll see just how quick the glimpse of the splash is. It's frustratingly fast and if you blink, it's easy to miss. In animation, we generally exaggerate things slightly so they're more appealing on screen. You can make life easier if you aim for realism, but your director or supervisor may like something a little more graceful than realism.
A note on float: In the cross-section sequence from the previous section, the droplet timing is deliberately slowed, partly for the demonstration but also to make it appear slightly more graceful. In some animated feature films, FX animators often exaggerate the "floatiness" of water splashes. As someone who mostly prefers realistic over stylistic, I'm generally against floaty water. Sometimes it's the theme or the FX director's style to make water floaty and dreamlike. Other times I think it's a vain liberty taken by animators who simply want their beautiful drawings to be hanging visible for longer -- not to mention cruel, considering that it's some poor FX assistant or inbetweener who has to do all that extra line mileage.
As this effect is made more realistic by artwork, than by treatment, we'll talk about what you can do to make droplets appear wet, shiny and real. The first thing I'd like to point out is that almost every water effect in 2D feature films have a sad, cheap colour scheme. My pet hate is flat blue water (or any other colour) with a bit of token transparency. Here are a couple of easy, yet rare qualities for super-effective water treatment.

Wet things have highlights, have you noticed? Well OK, we all have. When doing water treatment, the first concern MUST be a separate layer of highlights. No matter how many shades of blue a cheap studio puts into their water splashes, they simply aren't wet without highlights.
A highlight is the reflection of the light source. Have you ever seen the sun reflected in a steel ball? It's tiny! Avoid overdoing it with too large, or too many highlights. A tiny, elegant spark of white is much more effective than an storm of big, thoughtless blobs of white all over your water.
BCA Secret: The sky is huge. It takes up half of our world. When you create a highlight layer, consider adding a soft reflection of the sky.
.

Seen through beads of water, the world is back-to-front and upside-down. In a typical water droplet, I draw the "ground" at the top of the droplet, then the lighter "sky" near the bottom. Things on the scene's right show up in the left of the bead, and v.v. Choose colours from your background or scene to make the effect truly stunning.
Just as mentioned in the previous lesson about dust, transparency reveals flatness, so use any transparency wisely, or sparingly. If you're painting little backgrounds inside your water droplets like I do, you will rarely use transparency at all.
.
Beginner: Animate two separate water beads hovering, wobbling in the air, then slowly bring them closer until they touch and immediately form a single, larger droplet, wobbling.
Intermediate: Animate a cross-section of a water droplet
Advanced: From a view looking down at a water surface (as shown in the 'Design: Impact to Ripple' section, animate a full water droplet cycle. Add highlights to each splash bead and ripple on the surface. Be careful not to overdo the highlights.
You're developing your understanding of fluid dynamics! First by animating ripples, and now this study of surface tension has you animating droplets and small splashes. The next time we look at water effects, you'll be animating a more substantial splash with sheets of water disintegrating into strings and beads. Soon after you'll also start learning a bit more about light refraction and water reflections. It's getting serious now.

