Welcome to Level 1 where we'll start your animation journey with some
lightning FX! THIS
video is a breakdown of the planning, design and thought process
throughout animating a simple lightning scene. The rest of this level
will look closer at some fundamentals of lightning design and animation.
Electricity can be subtle, intricate and complex, but it's also
chaotic, which makes it very forgiving. This means that you can be a bit
reckless with the shapes and not concern yourself too much with
consistency. That said, if you introduce some subtlety into your
electricity scene, you can create something mesmerising. We'll get more
into that at a higher level.
Not my images - I found these images
on pinterest.com which always turns up a huge variety of reference and
inspiration, whatever you search.
Chaos forgives
When you start out as an FX animator, chaotic effects like electricity
allow you to really have fun moving the arcs and lines around, snapping
from interesting shape to interesting shape. This is one effect that
actually benefits from "line jitter" which is the otherwise unfortunate
result of inconsistent linework at high frame rates (something you'll
learn about when you work with more subtle animation).
In a later article we'll look at flowing electrical arcs but for now
we'll animate a lightning strike. Not only is lightning chaotic but it's
very fast, so you can animate a number of lightning strikes in a fairly
short time. You should be aware of some basic guidelines though. In this
article we'll look at:
Design - how to draw lightning
Timing - animating it with realistic movement
Treatment - colour and digital effects (glow, etc)
Along the way, we'll see some animated lightning scenes frame by frame,
and near the end I'll give you an exercise or two to practise.
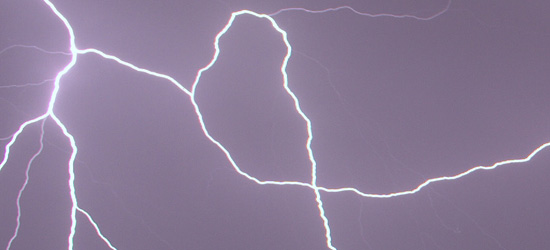
Design
The most recognisable and generic lightning design is the old universal
zig-zag motif. If you use this particular design in animation, it must
surely be a stylistic choice, because it's far from realistic.
Realism
I've always imagined lightning as a crack in the fabric of reality. As
such, cracks in a plaster wall or concrete pavement can be excellent
reference for lightning designs.
Cracks in earth, concrete and plaster can be
excellent design reference for realistic lightning.
These cracks in a road surface make an
interesting non-standard lightning design.
Cracks in concrete are an interesting and perhaps unexpectedly cool
lightning reference, so when you see some fractured concrete, you might
see a lightning design in there somewhere. A big part of FX animation is
learning to observe the real world, but a master of FX design sees shapes,
designs and possibilities that others don't.
Stylised
Quite often in animation we take liberties by exaggerating design, timing
and/or treatment.
In the case of lightning, it's often effective if your design features
some "thorny" bits (see image A, below). While it's not always realistic,
adding these jagged shapes will help sell the untamed viciousness of the
effect. Having curved, wavy shapes (see image B, below) will have the
opposite effect, so it's perfect for those flowing, graceful electrical
arc scenes.
A.
B.
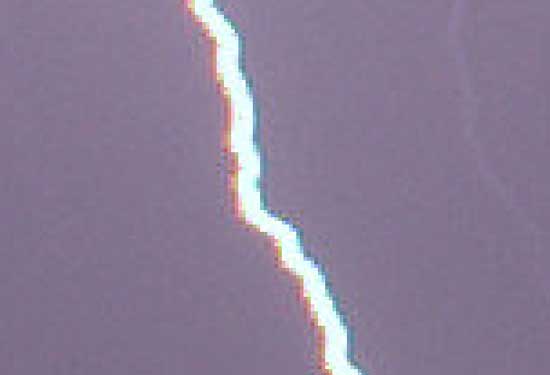
Weight variation
As seen in any of the images above, your lightning designs should have
a good deal of variation in the weight, or thickness, not just in the
main bolt and branches, but also in the forks of the branches. When your
digital glows are added, the flaring will be slightly more intense on
these thicker parts. If you don't overdo it, this makes the whole effect
nice and organic, rather than a consistent width glow all the way
around.
Mix it up - It seems that lighting in animation is
commonly thicker at the source and thinner at the destination, but why
not try mixing it up a bit? See what you can achieve by having a thinner
bolt with some more thickness near the ground (see image A, below).
Perhaps thin at the source AND destination, but thicker in the middle?
(see image B, below). Experiment and have fun. Remember that you are the
god of every scene.
A. B. (image credit: stormscapesdarwin.com)
Timing
There are many types of lightning from huge sprawling branches to
flickering bolts. Timing the lightning in your scene will depend on the
effect you're going for. Let's look at two common types for now: bolts and
branches.
Bolts
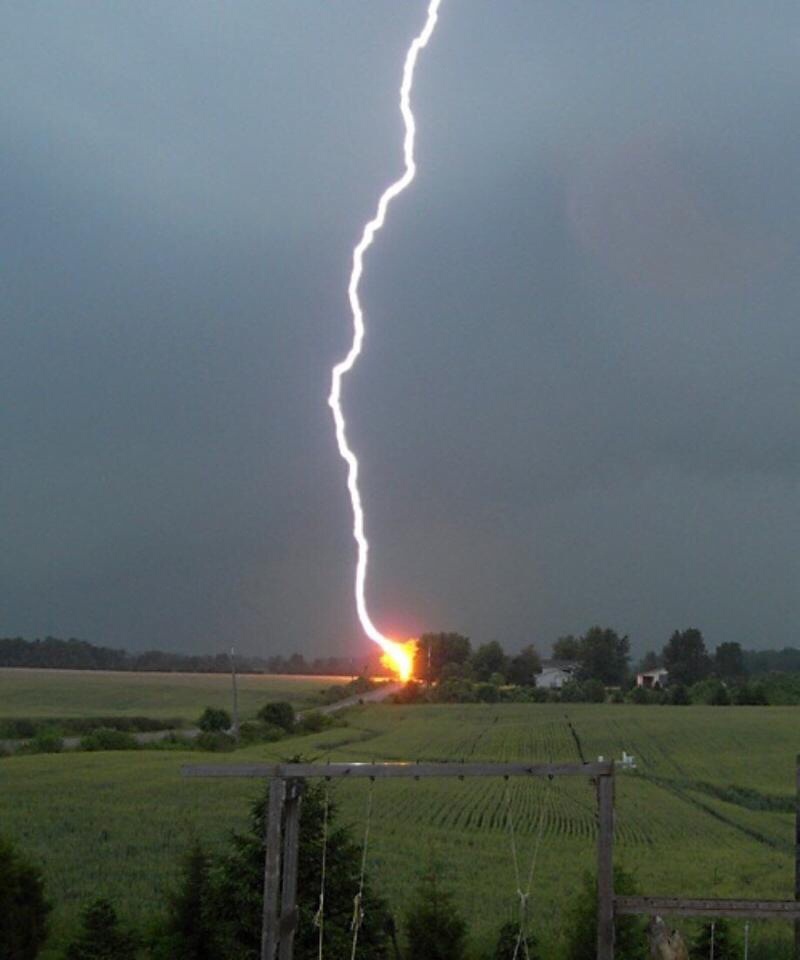
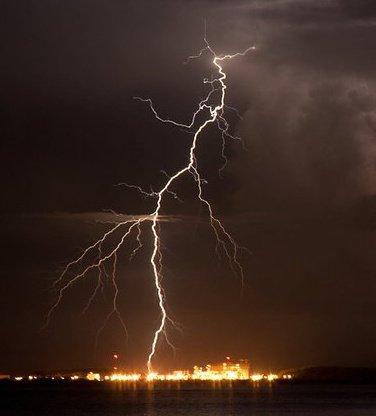
Electricity moves at the speed of light, which is 300,000km per second,
so most lightning bolts look just fine if they "pop on" then quickly
fade/flicker off (see example at Left).
Beware: if you animate a bolt "travelling"
(i.e. animating into shot), even if it's just one frame, it will slow
down the effect noticeably, reducing its impact. Sometimes this can be
useful, for example if the scene requires you to "telegraph" the effect.
One other effective and simple technique is to flicker a bolt on and off
twice on single frames, leaving the residual image in the viewer's eye to
do the rest (see example at Right). Try it yourself!
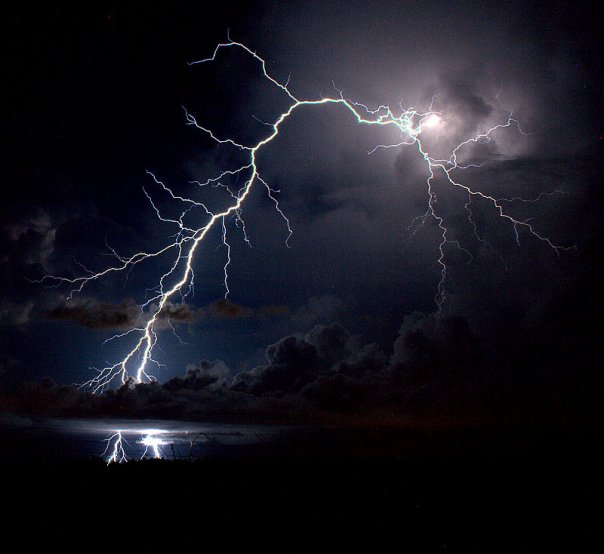
Branches
Cloud-to-ground "branch" lightning often resembles an upside-down,
skeletal tree. The intercloud variety (from cloud-to-cloud) sometimes
gives the awe-inspiring illusion of creeping, almost in slow-motion across
the sky. Even on such a massive scale though, it rarely and frustratingly
lasts more than a few frames.
The big challenge is to animate that sprawl with enough grace that it
appears slow, in turn giving the impression of vast distance. The key to
animating something like this is to make the main body of lightning flow
fairly gently, while the fingertips of the lighting creep outward, see
example below.
Contrast
In the frame-by-frame sequence below (and it some of the examples above),
you'll notice there is a completely black frame (2), followed immediately
by a white frame (3). In animation, these are a black card and a white
card, or simply "colour cards" (they can be any colour).
Using rapid, high contrast in this way is known to have a physical effect
on the viewer's eye and brain. It's an incredibly useful technique, but
also shamelessly abused. So many banner ads on the Internet these days
have some kind of flickering effect to force your eyes in that direction.
Don't overuse it! It's the visual equivalent of someone suddenly screaming
into your face.
In effects animation, we use contrast not only with colour but also in
other areas, like timing and volumes. The use of colour contrast in our
lightning scene gives it undeniable impact. There will be a future article
dedicated entirely to contrast because it applies in so many other
effects.
A simple bolt sequence with frame numbers.
For some real inspiration, check out the timing in these amazing videos
Treatment and Filters
Really, you can do what you want with the colours of your effects. For
the sake of realism though, let's assume lightning is a white-hot crack in
the fabric of reality. Knowing that light directly into a lens causes
flaring, we apply a glow or other "burning out" of the edge to give the
impression of real light in the lens.
For my own lightning treatment, I like to do a couple of things. Firstly,
I like to draw/paint the lightning in white. Regardless of the colour you
want your lightning to be, nothing says "HOT" like a white core. Then,
light, colour and heat are added using some glow filters.
NOTE: the image (right) is a gif, so those play controls won't work.
However, if you have a SWF or Flash player on your computer, you'll find
it in this chapter's files folder and you can frame-by-frame the
animation.
Glows
My first glow is a broad, bluish-white. For fantasy, you can experiment
with colour. Anything bright and saturated usually works well. If your
software or medium allows you to control the glow falloff, you could try
giving more intensity to the inner part of the glow, then fading outward.
Otherwise, I would apply a second, tighter glow with a narrow blur radius.
This is merely to give the lightning some heat and I often use red because
that's the hot end of the spectrum.
Chromatic Aberration
Look closely at high resolution lightning photographs and you can often
see a thin red edge on the left, and a thin blue/green edge on the right.
Most VFX and compositing software has a filter called chromatic
aberration which applies this effect. Combined with the other more
broad glows, this is a very effective and subtle technique.
Assignments
Feel up to animating some lightning now? Here are some setup parameters
and an FX layout to get you started on a single lightning bolt.
Everybody wants to add glows and light and make it cool; nobody can
stop you doing that BUT REMEMBER: this is an animation
course, and particularly at this early stage you should focus primarily
on the design and timing. Again, resist moving on to the next
phase until you're completely happy with the foundations. Good luck!
----------------------------------
Beginner
Suggested time to complete task: 5-10 minutes
A single lightning bolt of your own design.
Frame rate: 24fps
Duration: 2 seconds (48 frames)
Dimensions: 200 x 200px
The lightning bolt should start around 12-14 frames into the scene.
Don't feel compelled to fill up the entire 48 frames with lightning.
Make it look natural and don't be afraid to leave blank frames.
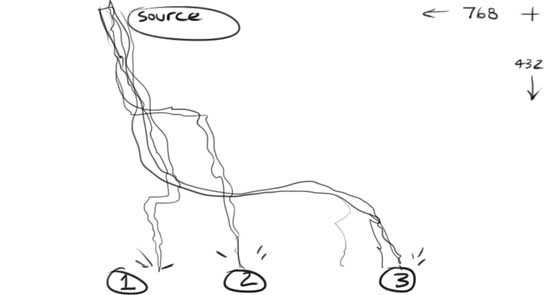
Intermediate
Suggested time to complete task: 15-20 minutes
Three quick lightning bolts coming from the same source
position but striking in different locations.
Frame rate: 24fps
Duration: 3 seconds (72 frames)
Dimensions: 300 x 300px
The bolts should all start at the same position and each strike
should be a different design and timing, giving variation and
potentially some character to each bolt. Feel free to add sparks or
any other scene elements.
Summary
You've reached the end of your first level! This concludes an
introduction to electricity and lightning. There will be more
electricity in future articles, including more flowing and graceful
electrical arc animation, as well as the use of electricity in magic!


 A.
A. B.
B.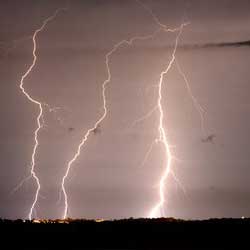 A.
A. B.
B.